Giving your kitchen cabinets a fresh coat of paint is one of the easiest ways to transform your space without spending a fortune. Instead of replacing cabinets, painting lets you update the color, style, and overall feel for a fraction of the cost.
In this guide, you will learn exactly how to prep, paint, and finish your cabinets for a smooth, professional-looking result. The difference before and after can be dramatic, turning outdated cabinets into a clean, modern focal point you will love every day. It gives you the confidence to tackle DIY projects and personalize your kitchen how you want.
Is Painting Kitchen Cabinets Worth It?
Wondering if painting your kitchen cabinets is really worth the effort? For many homeowners, it is a cost-effective way to refresh the entire kitchen without a full renovation. You can choose any color or finish to match your style, and the results can feel brand new in just a few days.
However, it does take time, preparation, and patience, and poorly done paint may not last as long. Painting works best when cabinets are structurally sound, while replacement is better for damaged or outdated layouts. If you want a upgrade and cabinets are good shape, painting is a smart choice.
Tools & Materials You’ll Need
- Paint (latex, oil-based, or cabinet-specific): Choose a high-quality option for a smooth, durable finish that holds up to daily use.
- Primer: Helps paint stick better and creates an even base, especially for darker cabinets or glossy surfaces.
- Sandpaper or sanding tools: Use sandpaper, a sanding block, or an electric sander to smooth surfaces and improve paint adhesion.
- Degreaser or cleaner (TSP): Removes grease and buildup so paint goes on cleanly and lasts longer.
- Brushes, rollers, or paint sprayer: Pick what you’re comfortable with for even, streak-free coverage.
- Drop cloths and painter’s tape: Protect floors, countertops, and walls from paint splatters.
- Screwdriver: Needed to remove cabinet doors, hinges, and hardware before you start painting.
Choosing the Right Paint for Cabinets
Choosing the right paint can make a huge difference in how your cabinets look and last over time. Durable options like cabinet-specific or high-quality latex paints are popular because they resist chipping and wear. When it comes to finish, satin and semi-gloss are favorites since they are easy to clean and slightly reflective without showing too many imperfections.
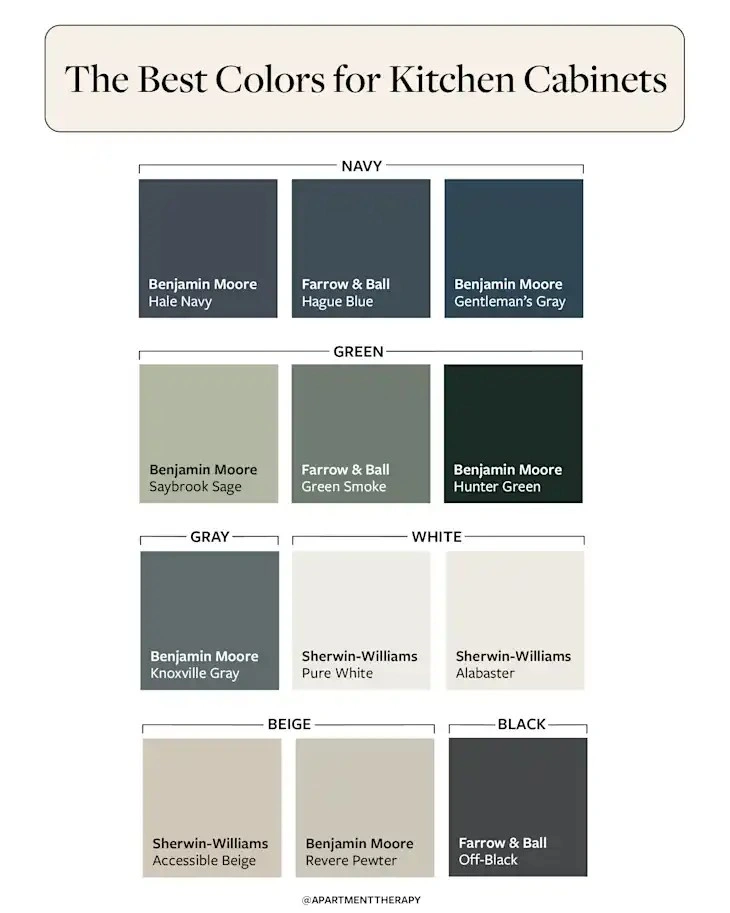
Color choice is where you can really have fun, with timeless options like white and greige or bolder shades like navy and sage green. Picking the right combination helps your kitchen feel fresh, cohesive, and completely transformed.
Step-by-Step: How to Paint Kitchen Cabinets
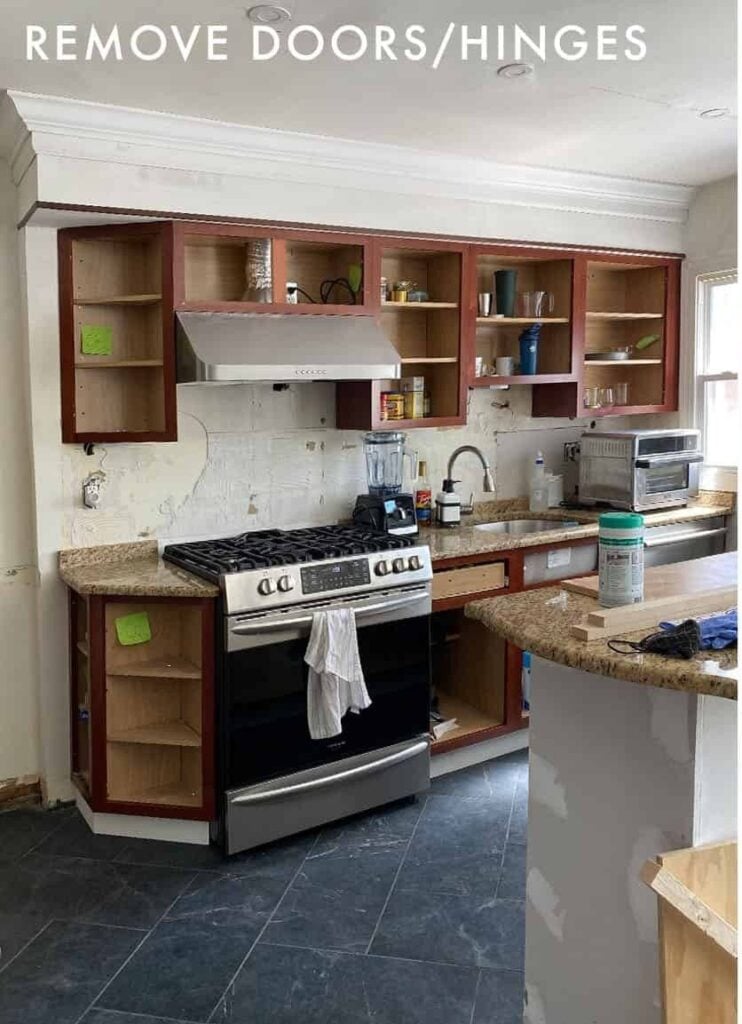
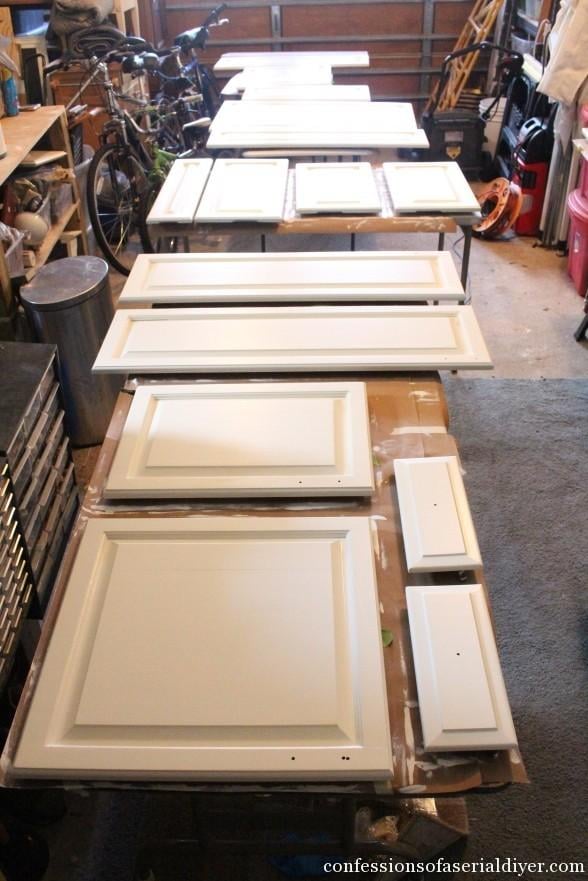
1. Remove Doors, Drawers & Hardware
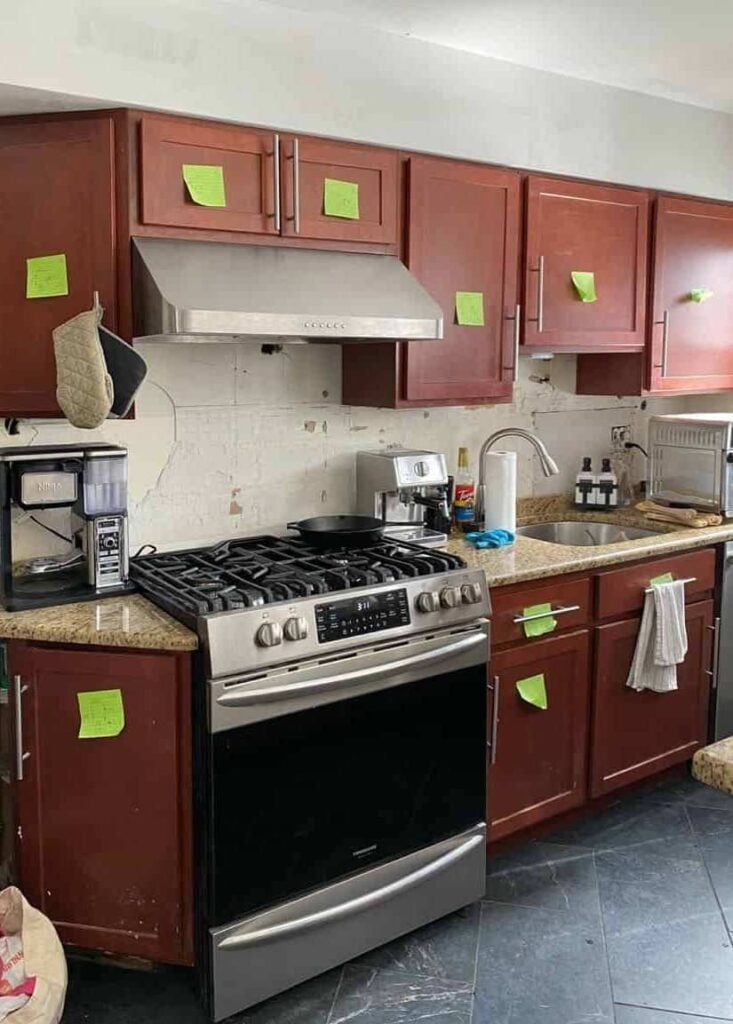
Start by removing all cabinet doors, drawers, and hardware to make painting easier and more even. It might feel tedious, but it makes a huge difference in the final result. Take a moment to label each piece as you go, so reassembling everything later feels quick and stress-free.
2. Clean & Degrease Surfaces
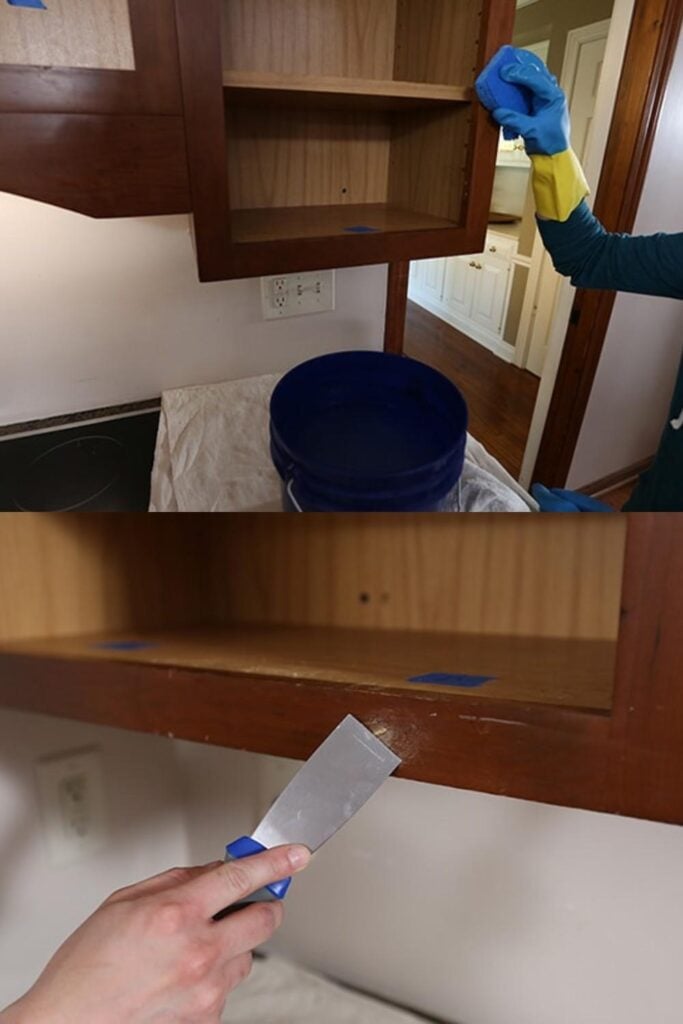
Before painting, give your cabinets a thorough clean to remove grease, dirt, and buildup. Kitchens collect more grime than you think, and skipping this step can ruin your finish. Using a good degreaser helps paint stick properly, giving you a smoother, longer-lasting result that looks fresh and professional.
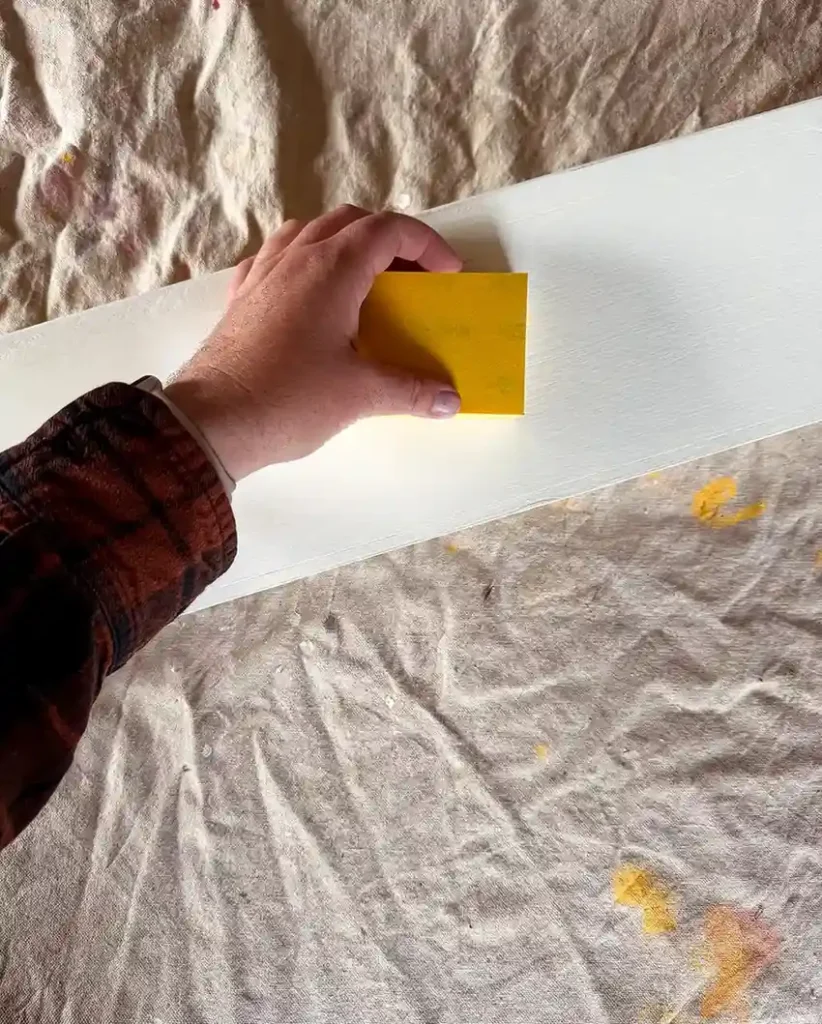
3. Sand the Cabinets
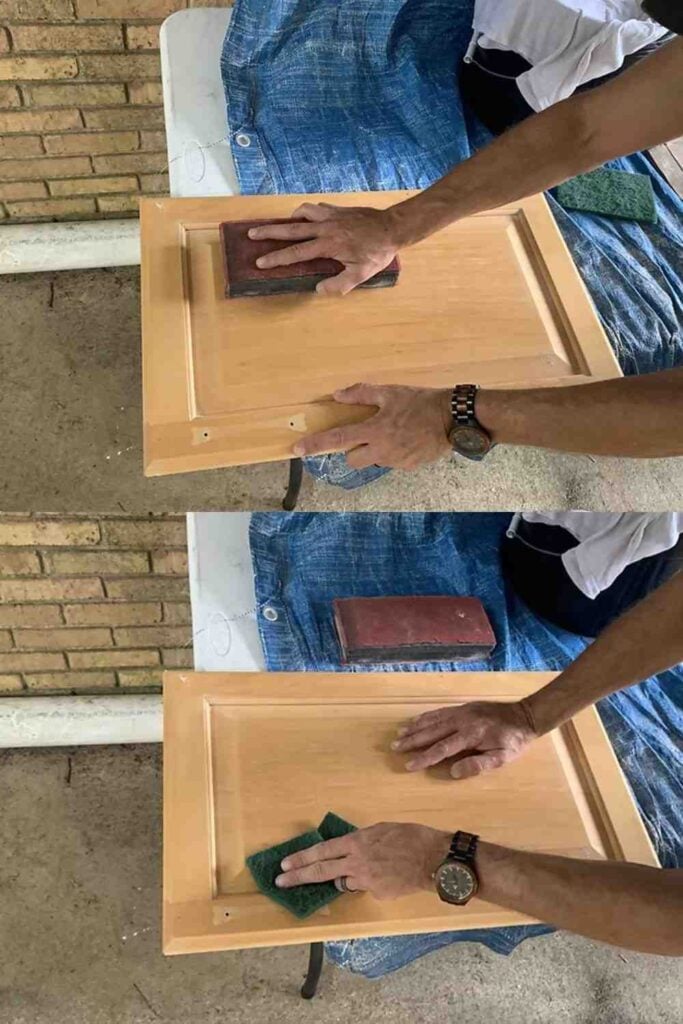
Sanding helps your paint stick better and gives you that smooth, professional finish. A light sanding is usually enough to remove shine and rough up the surface, while full stripping is only needed for heavily damaged or glossy cabinets. If sanding feels like too much work, a liquid deglosser is a great shortcut.
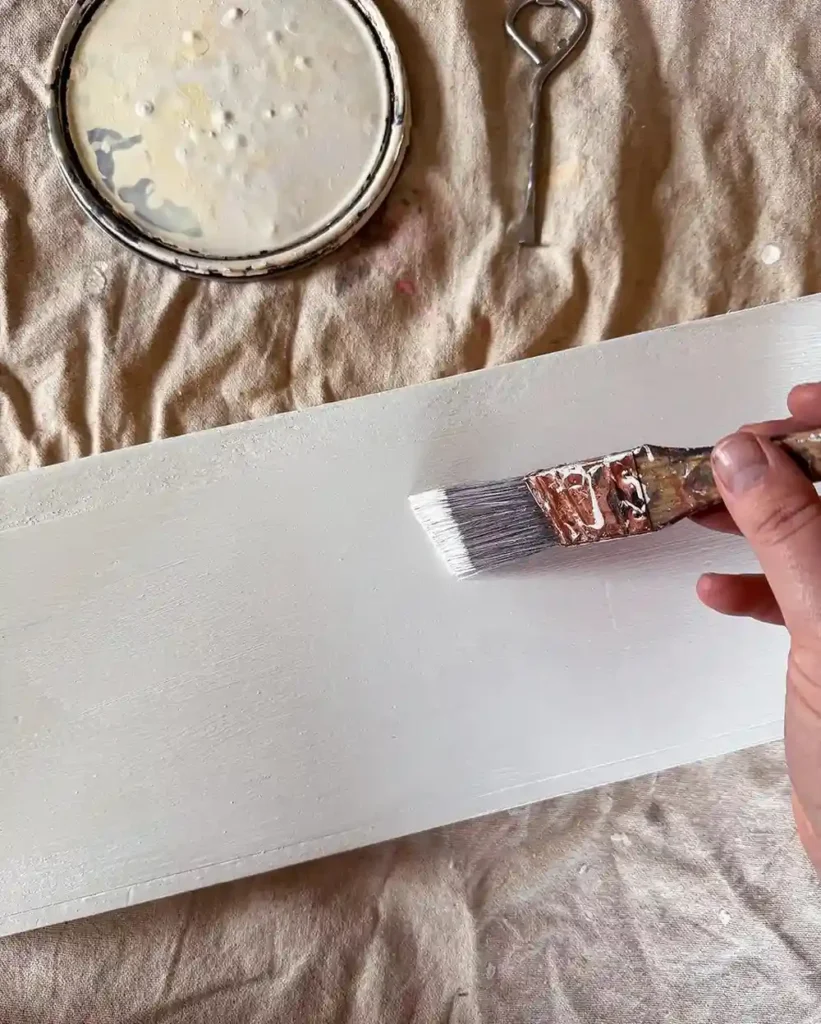
4. Apply Primer
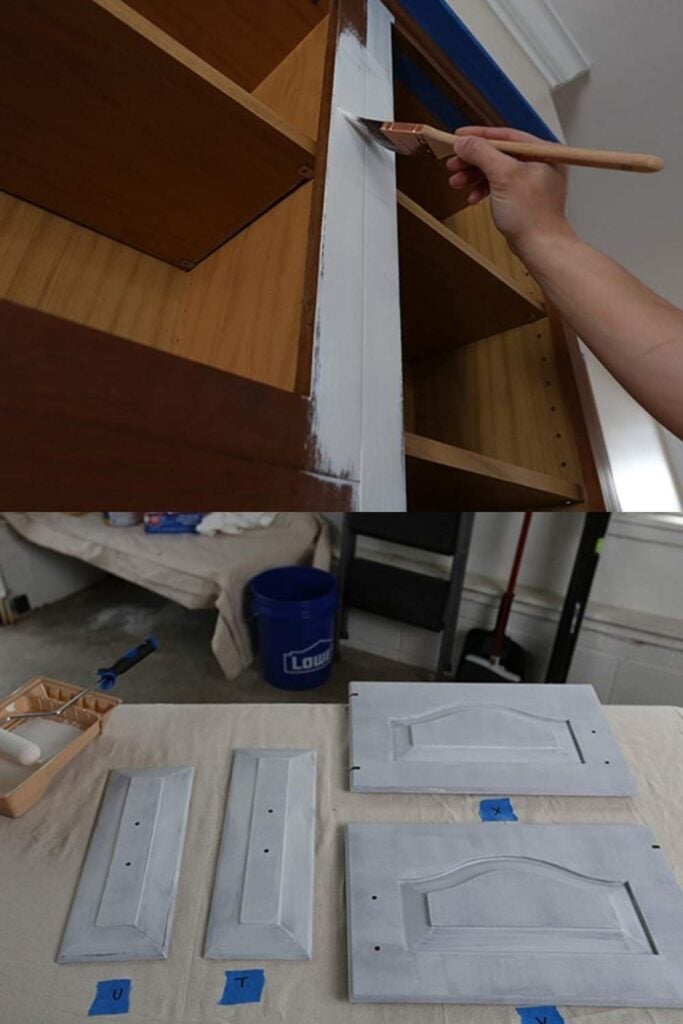
Primer might feel like an extra step, but it makes a huge difference in how your cabinets turn out. It helps the paint stick properly, prevents stains from showing through, and creates an even base. Let it dry completely before painting, and you’ll get a smoother, longer-lasting finish that looks professionally done.
5. Paint the Cabinets
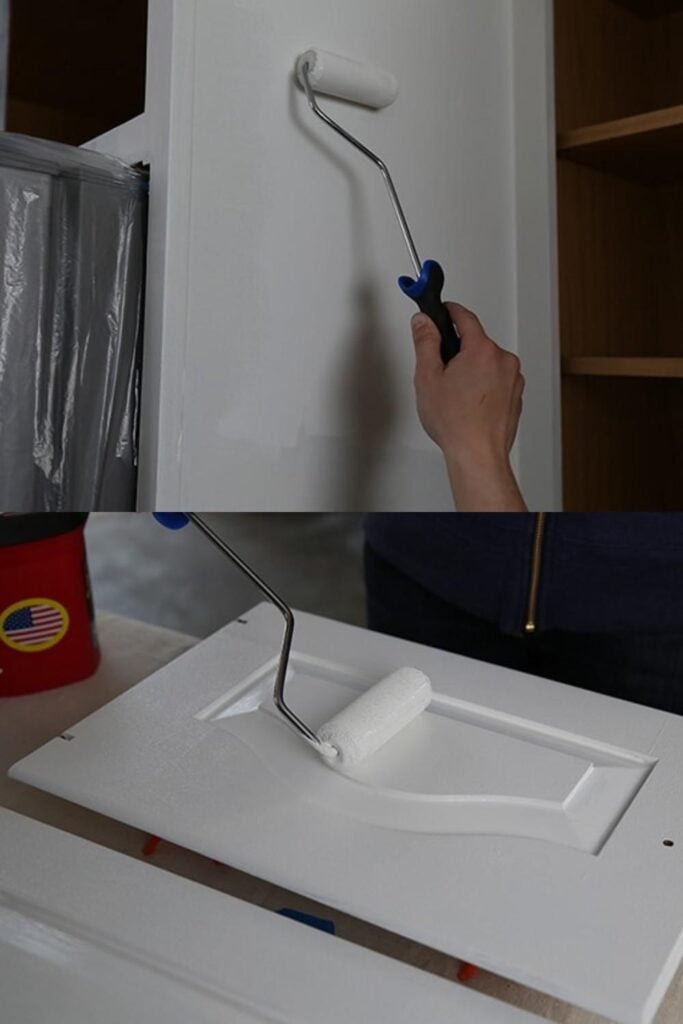
Now comes the fun part—painting your cabinets. You can use a brush for detail, a roller for smooth surfaces, or a sprayer for that ultra-polished look. Apply thin, even coats instead of thick ones to avoid drips. Let each coat dry fully before adding another for best results.
6. Reassemble Cabinets
Once everything is dry, it’s time to put your cabinets back together. Reattach doors, drawers, and hardware using your labels as a guide. This step is where everything starts to come together. If you want an extra upgrade, swapping out old handles or knobs can instantly elevate the finished look.
Pro Tips for a Smooth, Professional Finish
Getting that smooth, professional-looking finish is all about patience and technique.
Apply thin, even coats instead of rushing with thick layers to avoid drips and streaks. Lightly sanding between coats helps keep everything silky smooth.
Try to paint in dry conditions, since humidity can affect how paint dries. Most importantly, give your cabinets time to fully cure before heavy use.
It might be tempting to rush, but waiting ensures your hard work lasts longer and looks better. Taking your time here really makes the final result feel polished and worth the effort.
Common Mistakes to Avoid
It’s easy to make small mistakes that can affect your final result, but knowing what to avoid helps a lot. Skipping prep work is one of the biggest issues, since paint will not stick well without proper cleaning and sanding.
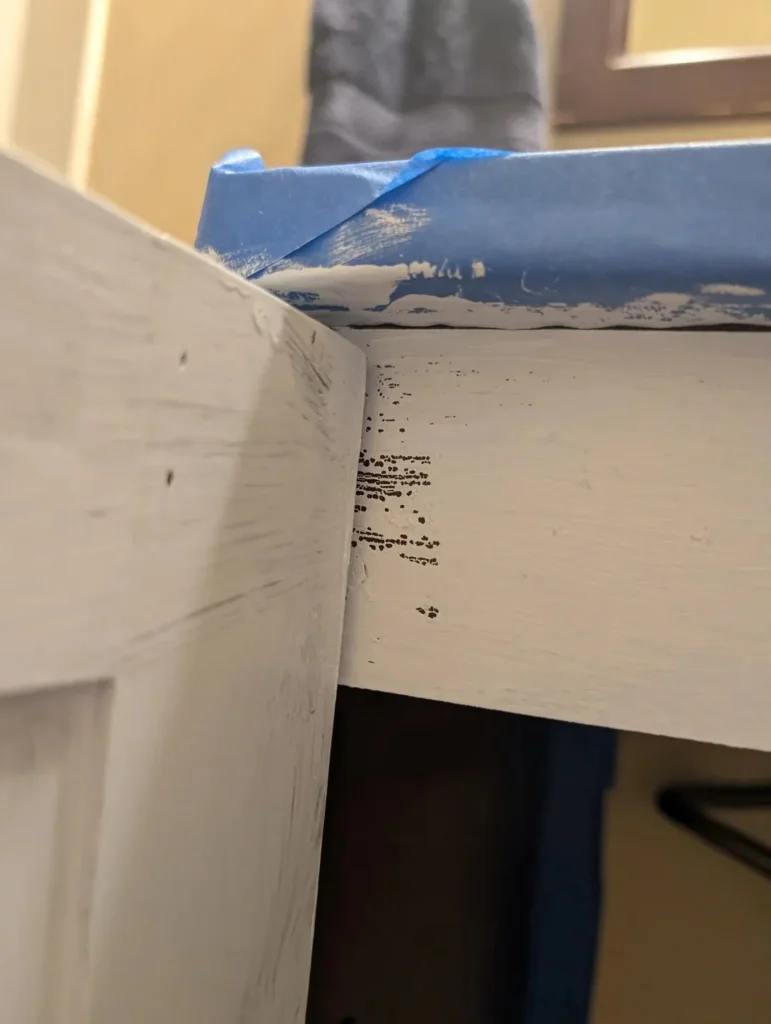
Using the wrong paint can also lead to chipping or uneven coverage. Another common mistake is not allowing enough drying time between coats, which can ruin the finish.
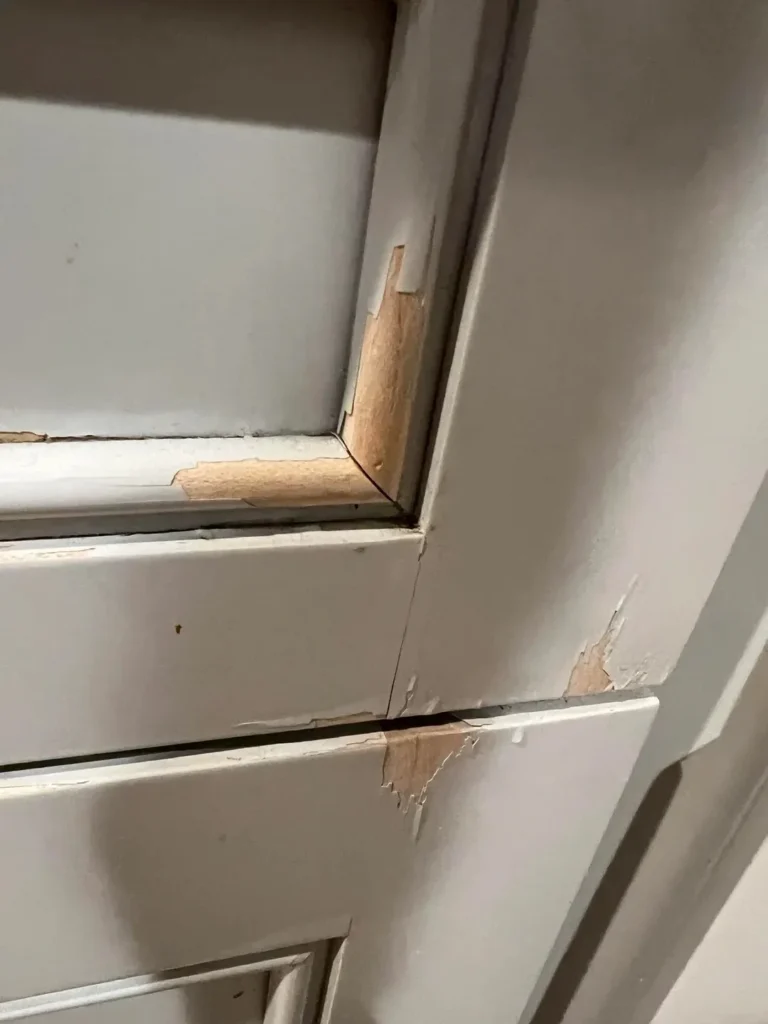
Painting over grease or dust is another problem that causes peeling later. Taking a little extra time to do things properly will save you frustration and give you a finish you’ll actually love.
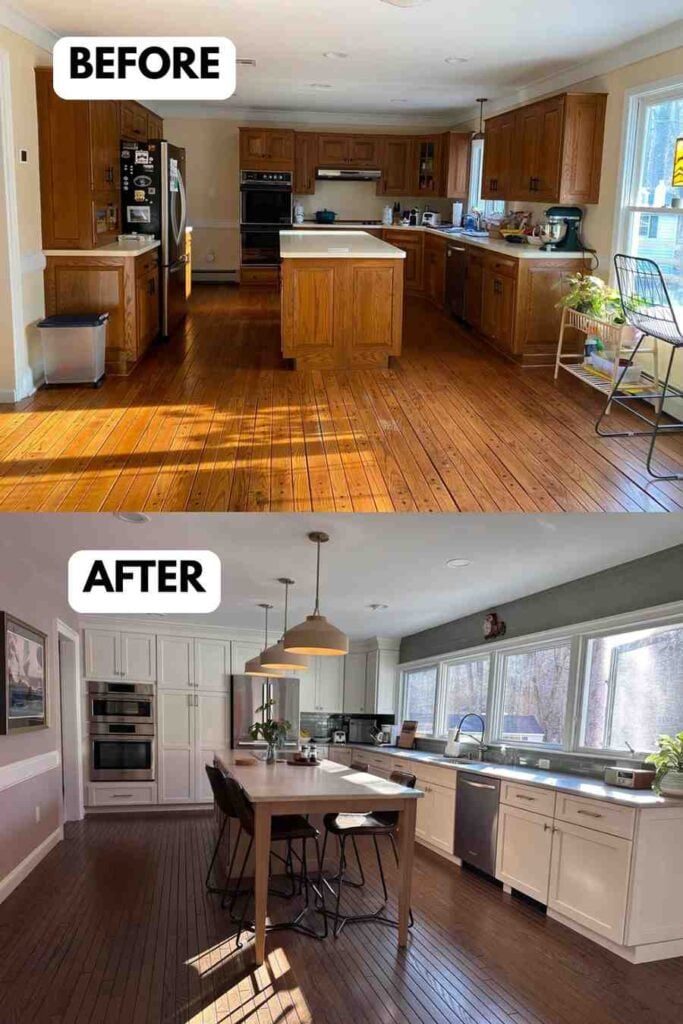
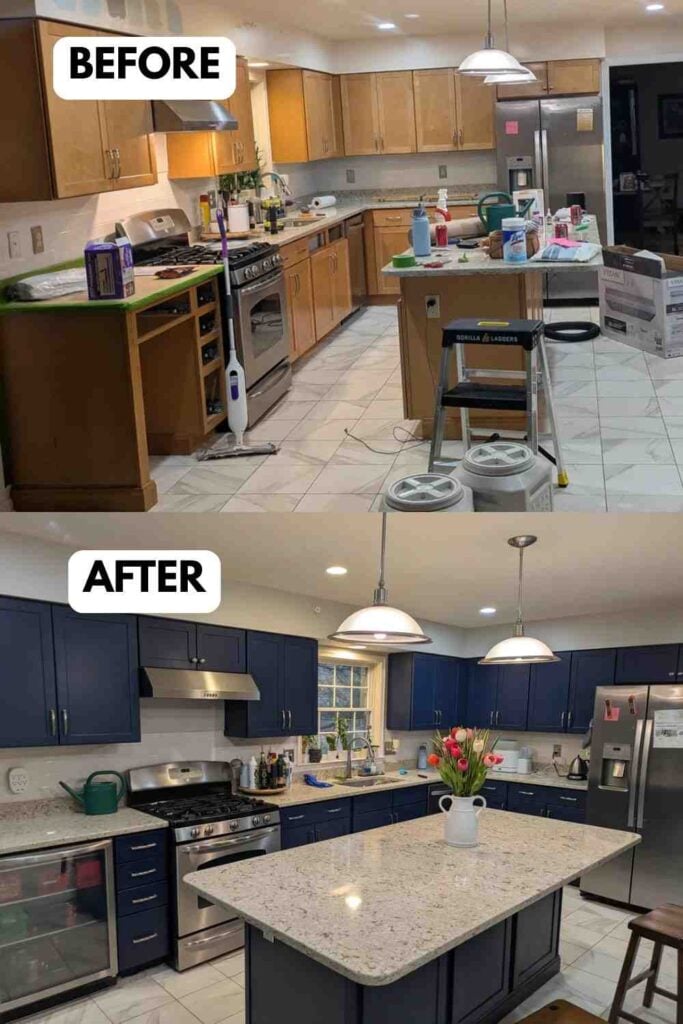
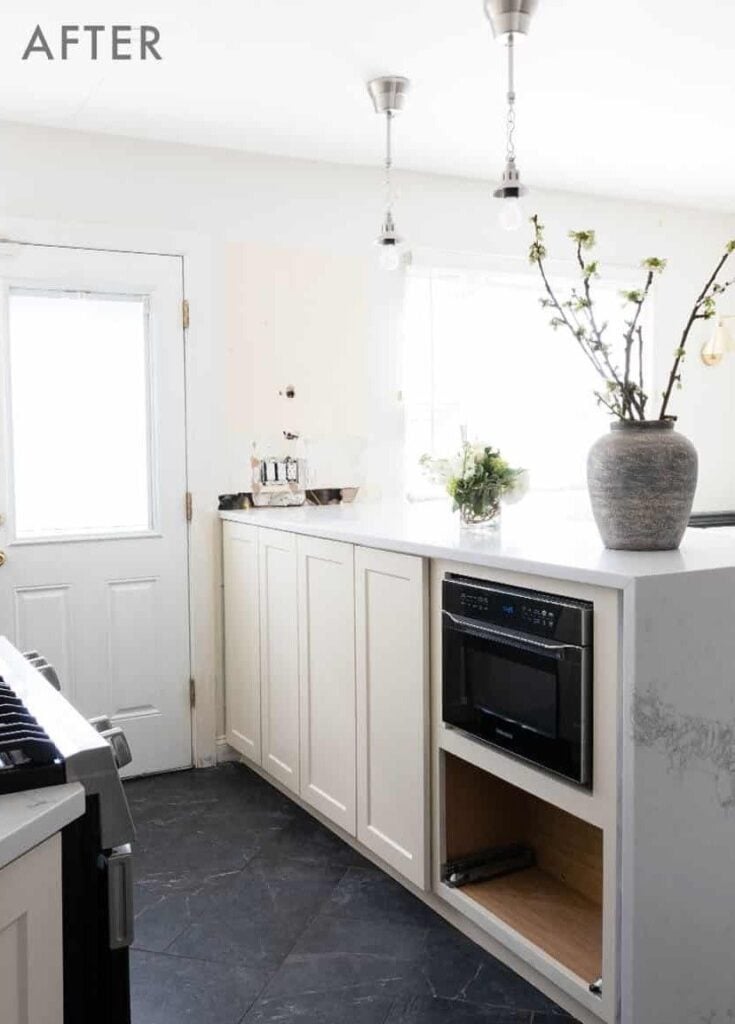
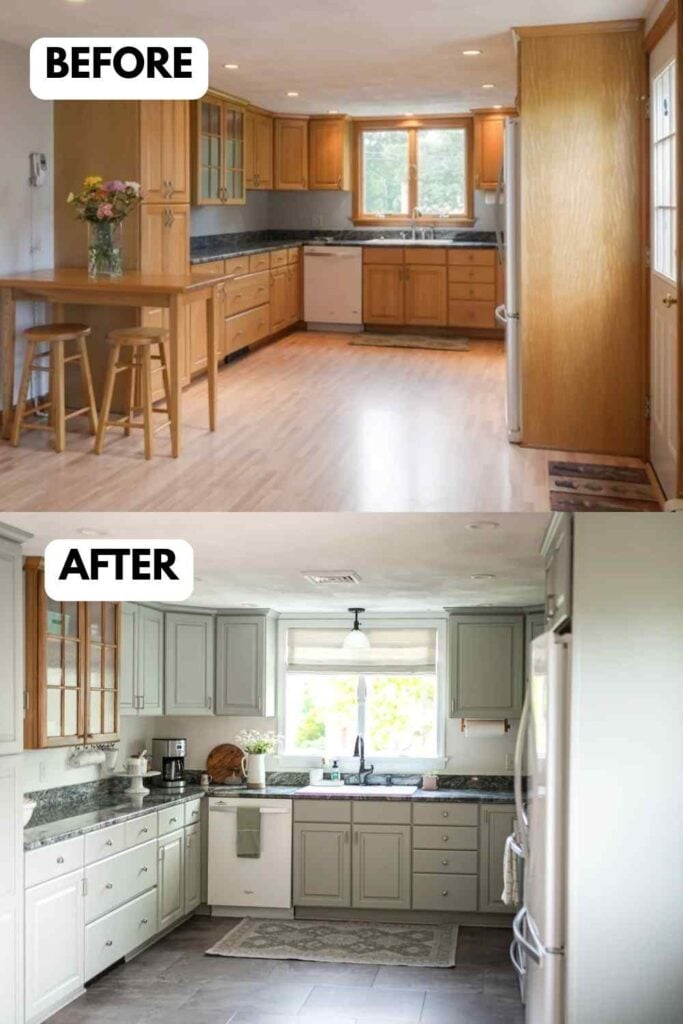
Before & After Inspiration Ideas
Looking at before and after transformations can really spark ideas for your own kitchen.
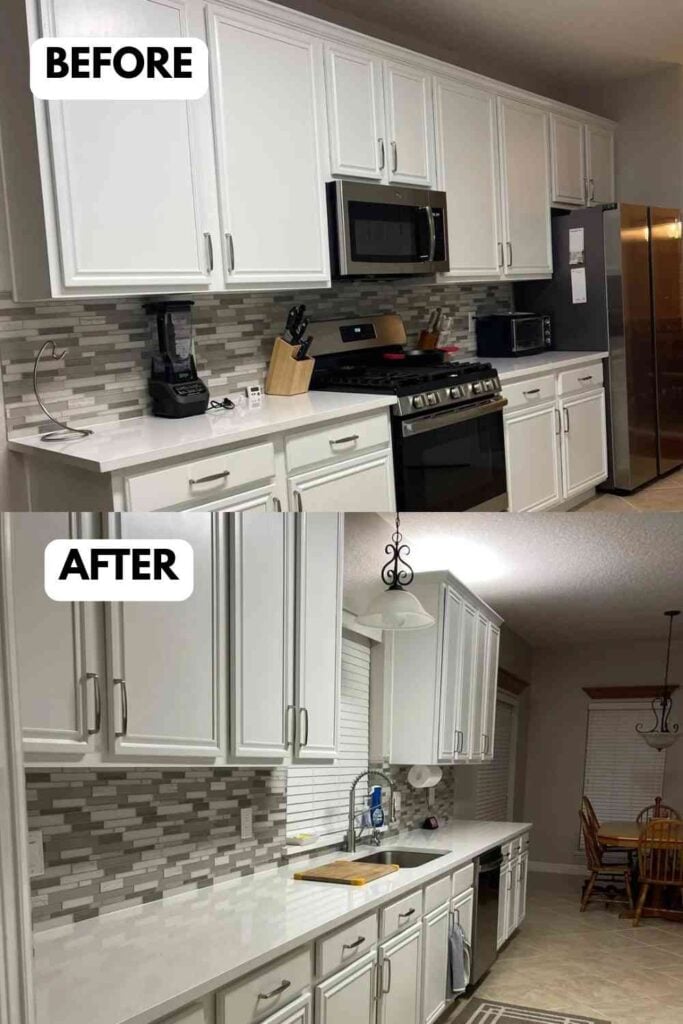
Light cabinets can make a space feel brighter and more open, while darker shades add depth and a more dramatic look.
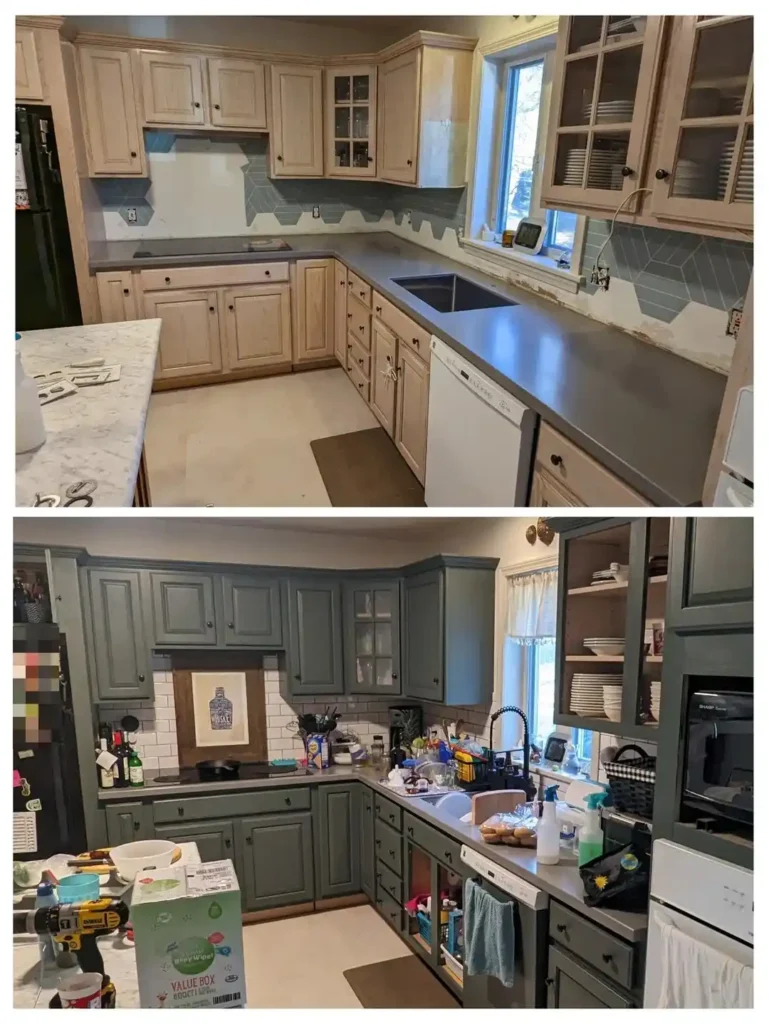
Two-tone cabinets, like pairing light uppers with darker lowers, create visual interest and a custom feel.
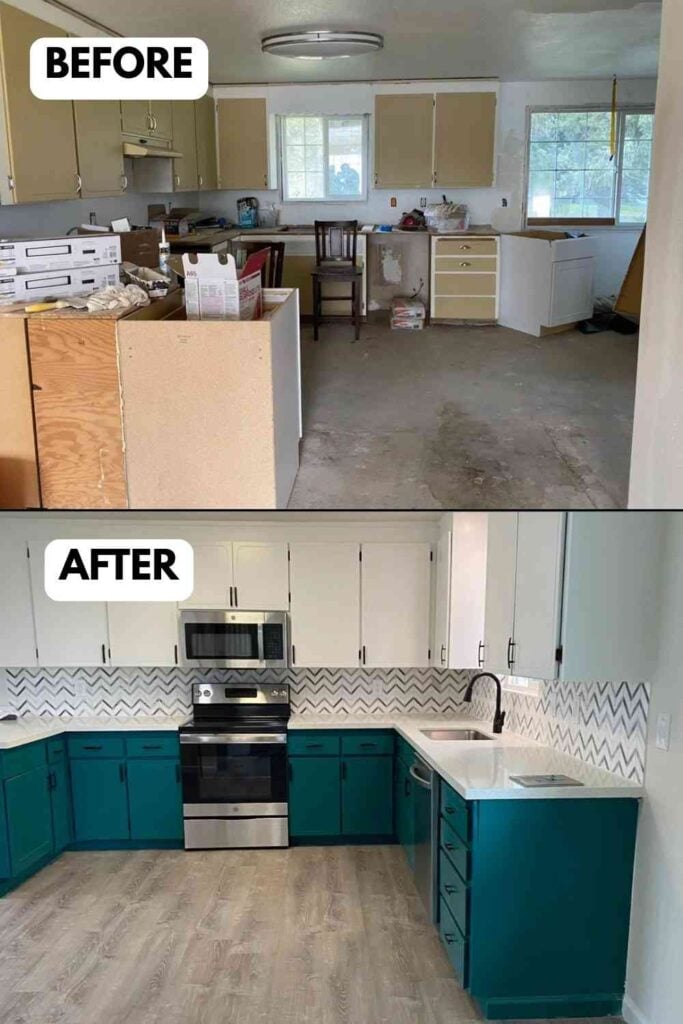
You can also shift styles completely, going from a traditional or outdated look to something modern and sleek, or even a cozy farmhouse vibe. Small changes in color and finish can completely change how your kitchen feels, making it more stylish, inviting, and uniquely yours.
FAQs
- Can I paint cabinets without sanding?
Yes, you can use a liquid deglosser instead of sanding, but light sanding still gives better adhesion and a smoother finish.
- What is the most durable paint for cabinets?
Cabinet-specific or high-quality latex paint is the most durable, as it resists chipping and daily wear.
- How long do painted cabinets last?
Painted cabinets can last 5–10 years or more with proper prep, quality paint, and good maintenance.
- Can I use a roller instead of a sprayer?
Yes, a foam roller can give a smooth finish, though a sprayer usually looks more professional.
Painting your kitchen cabinets might seem like a big project at first, but it’s one of the most rewarding upgrades you can do. With the right tools, proper prep, and a little patience, you can completely transform your kitchen without spending a fortune.
From cleaning and sanding to painting and reassembling, each step plays a role in the final result. The difference before and after can be truly impressive, turning outdated cabinets into a fresh, modern feature. If you’ve been thinking about it, this is your sign to give it a try and make your kitchen feel brand new.
Read Also: